
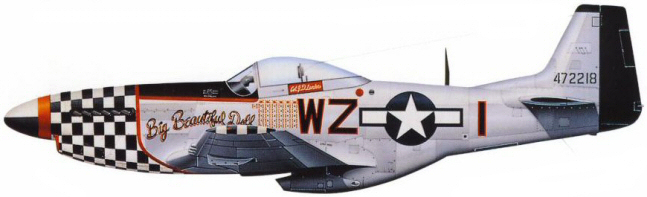
YT International P51D - PaintingWell it's time to paint the model, and still plan on Big Beautiful Doll. I will be using Klass-Kote paints again as they gave such an impressive finish to my 109 wings. If I can offer one tip on painting it's NOT to chop and change paint types and brands from primer to base coats to clear coats etc. It's a recipe for disaster in the making in my opinion. Stick with what you know works and don't use the model for experimenting! Do what I do, make a test panel up and paint it as you paint your model then you can experiment there!!
Plan your paints from the primer to the final clear coat before you do anything, taking into account everything you are going to do including decals, insignia, and weathering etc. |
 |
For the priming I am using Klass-Kote White primer which will level off the surface of the model for painting. Some of the glass cloth work I have done on this model is not my best work as I snagged the cloth several times in some areas, so the first primer coat will probably be used to highlight the high areas that need a little more wet and dry treatment.
The main colours of Silver, Black, White, Red, Insignia Blue, and Olive Drab, have all been purchased in sufficient quantities to complete the model.
So let's get started by getting some primer on! |
 |
 |
 |
 |
 |
 |
| 1. Click to enlarge | 2. Click to enlarge | 3. Click to enlarge | 4. Click to enlarge | 5. Click to enlarge | 6. Click to enlarge |
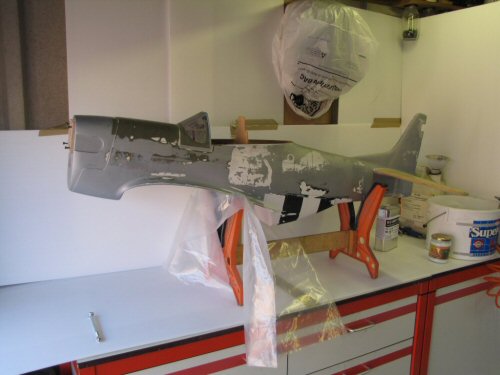
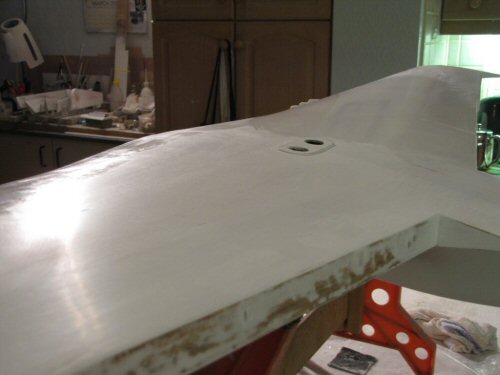
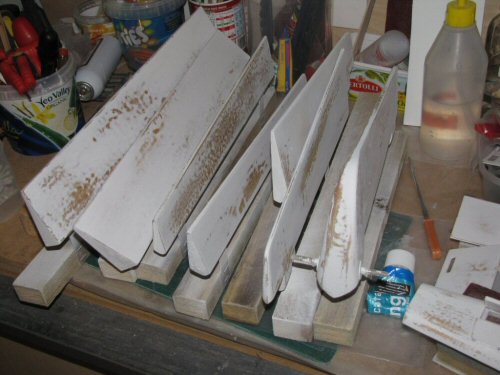
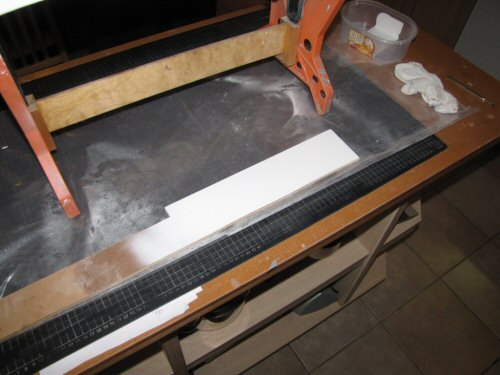
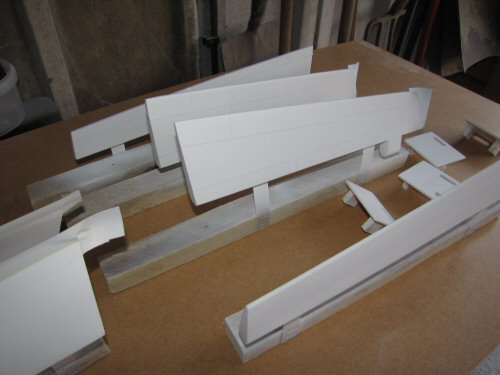
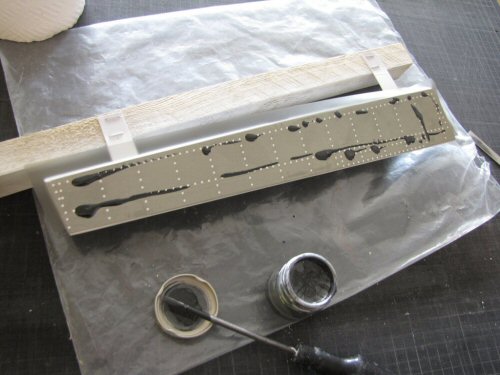
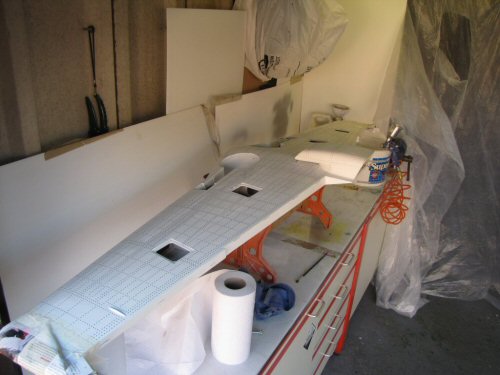
Pic 1. Unfortunately I do not have a fully fitted spray booth, but I do have a garage that I can make suitable space for spraying. Items in the garage are covered in cloth to protect from over spray. It is important to have the area clean and as draft free as possible. I can do the cleaning part but the spray area is next to the up and over door so I have the choose my days carefully! So the fuz is first in and has been cleaned down with cleaning fluid and wiped over with a tack cloth. Pic 2. Similarly the wing was sprayed last as it needs to rest in the spray area. No problems really the primer goes on really nice with a low cost small HVLP spray gun. Pic 3. All surfaces were given a wet & dry clean up with the 600 grit abrasion pad (available from Fighter Aces) Which cut back the primer nicely. Pic 4. That done the wing was not too bad. Some sheeting discrepancies in the wing but nothing that makes me want to get the fillers out for. Pic 5. Where my glass cloth skills had failed was on the control surfaces. Some parts needed heavy rework and in many areas I was cutting all the primer off. No matter it had to be done! A further application of primer was added to those components that required it. Pic 6. Not an interesting shot but the white primed wood is a scrap of MDF that has been glassed and primed at the same time. This is the test stick I mentioned earlier for tests and experiments should they be necessary. |
 |
 |
 |
 |
 |
 |
| 1. Click to enlarge | 2. Click to enlarge | 3. Click to enlarge | 4. Click to enlarge | 5. Click to enlarge | 6. Click to enlarge |
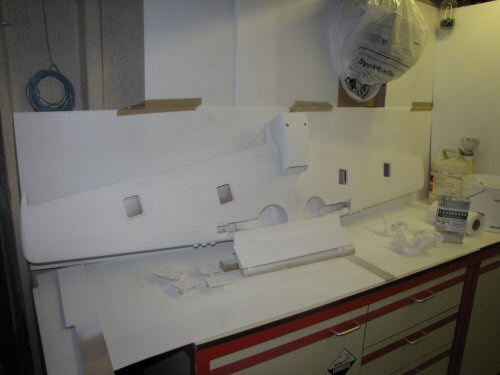
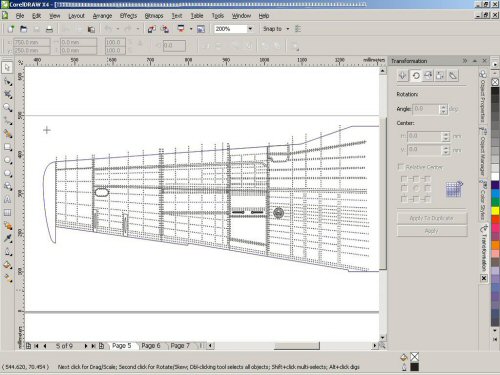
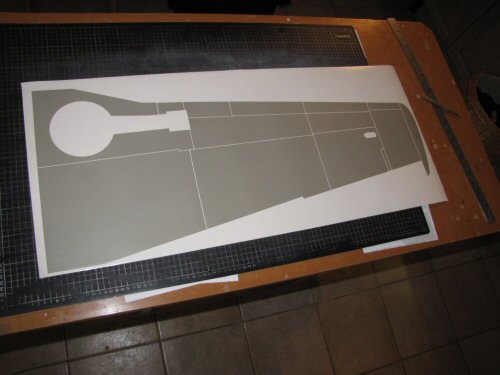
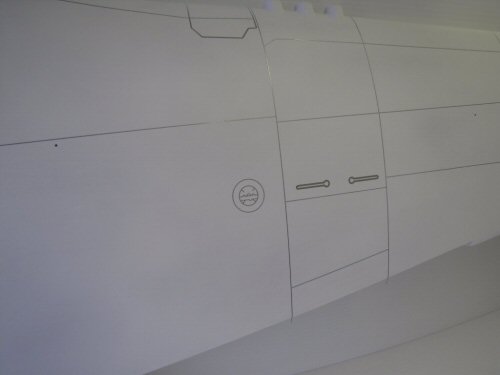
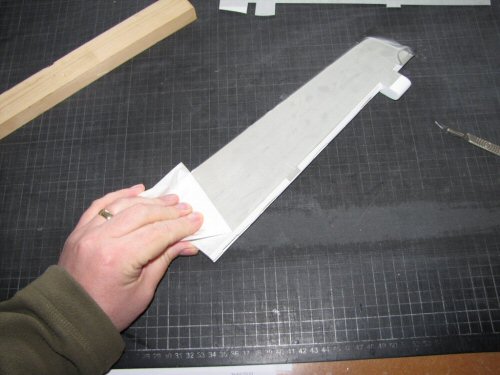
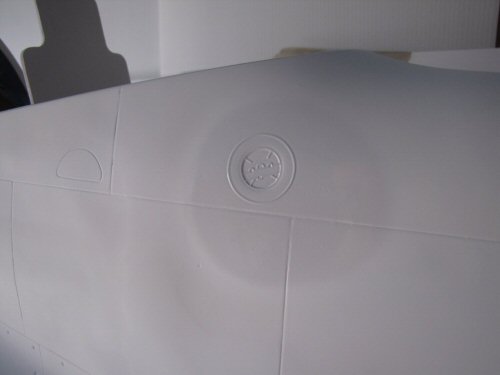
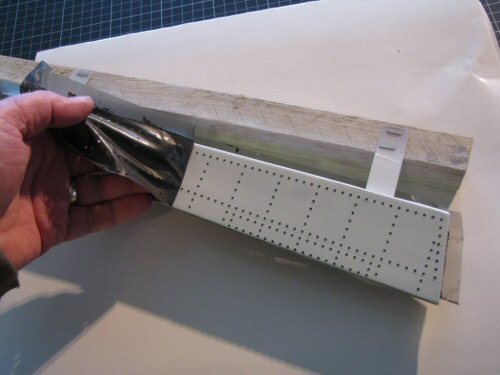
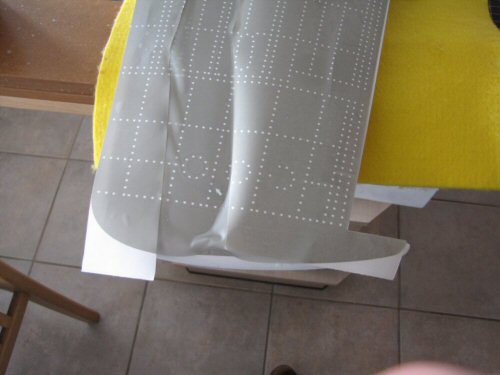
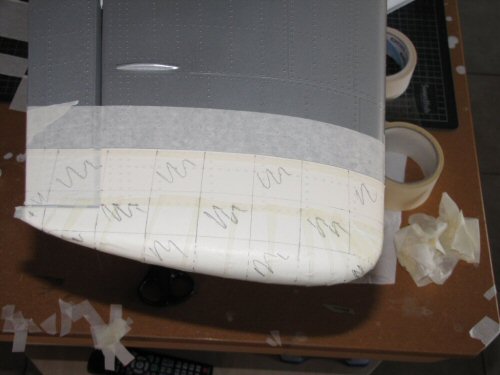
After some considerable deliberation I finally came to the conclusion I would try my hand at a paint mask for the panel lines and rivets on the wings. The plan was to draw the panel lines first and to overlay the rivets using paint masks. Those of you that have been following the build will have noticed a considerable pause in the build at this stage, well this is the reason for the pause!! Pic 1. Shows one of the screens during the design phase. Port top Wing with 4,000 plus rivets all in order. Pic 2. The first mask off is a guide mask for the panel lines which were laid in the grooves cut into the mask. Pic 3. Application of the panel lines was rather time consuming but the guides helped to made the installation process straight forward. Pic 4. Along the wing I have installed 3 reference points to enable alignment of the next mask for the rivets. Pic 5. Some of the paint mask was also cut to deposit other features such as the fuel filler and the machine gun access hatch mechanism. Pic 6. In the spray area ready for another run over with primer over the panel lines etc. |
 |
 |
 |
 |
 |
 |
| 1. Click to enlarge | 2. Click to enlarge | 3. Click to enlarge | 4. Click to enlarge | 5. Click to enlarge | 6. Click to enlarge |
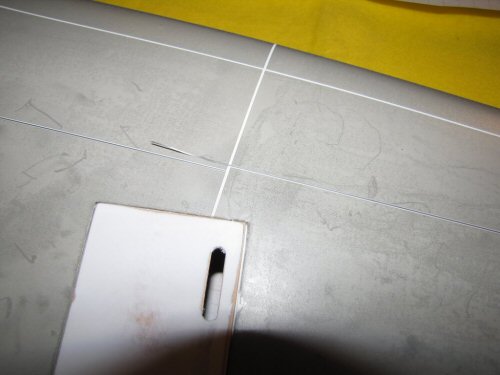
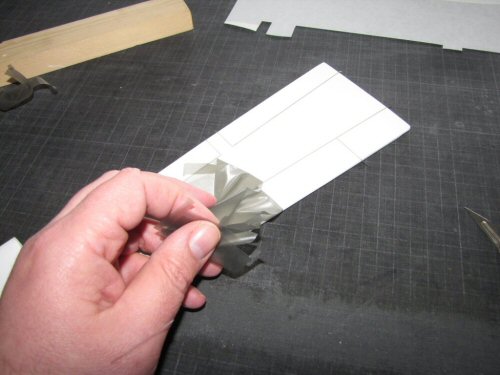
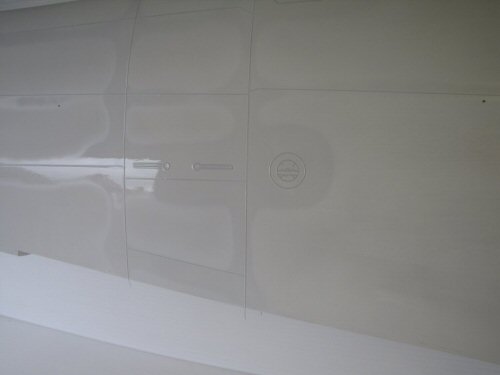
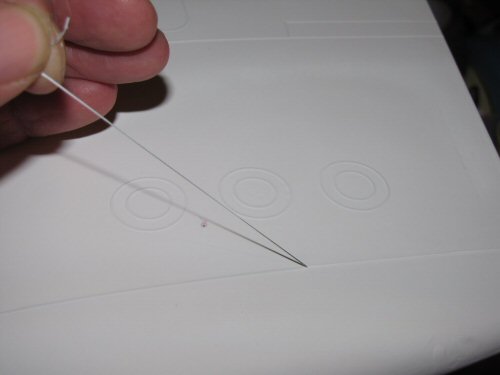
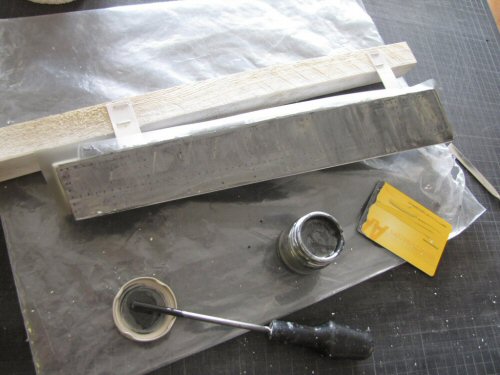
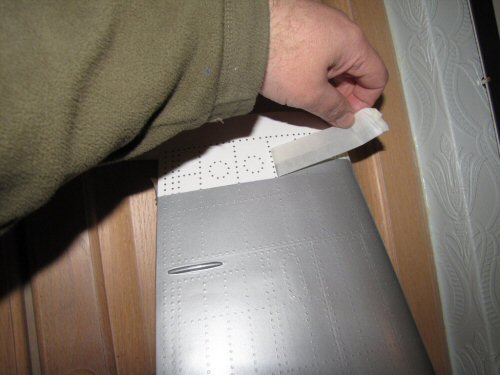
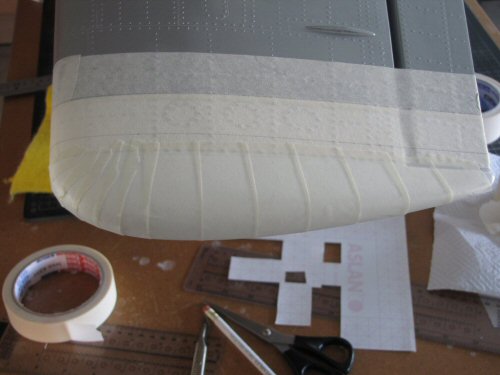
Pic 1. Besides the wing, the elevators, horizontal stab, ailerons, and flaps were all treated to a panel line or two. Pic 2. For these smaller surfaces, the panel lines were cut into the masks themselves, so it was a simple matter of apply, remove application tape, then remove excess materials as shown here. Pic 3. After a few passes with primer a steady ridge has formed next to the tapes. Pic 4. Another mask was used on the indentation on the YT fuselage where the fuel filler goes. The mask was sized to fit the hole.. Pic 5. With the Klass-Kote primer I know I can remove the tape after about 40 minutes drying. If you prefer to wait for the paint to dry fully, it is advised to cut back the excess paint on top of the tape with 800 grit or higher wet & dry to expose the tape before pulling it out. This ensures a nice clean edge. Pic 6. Once all of the tape was removed a light run over with fine wet & dry smoothed the surface and sharpened the edges of the newly formed panel lines. |
 |
 |
 |
 |
 |
 |
| 1. Click to enlarge | 2. Click to enlarge | 3. Click to enlarge | 4. Click to enlarge | 5. Click to enlarge | 6. Click to enlarge |
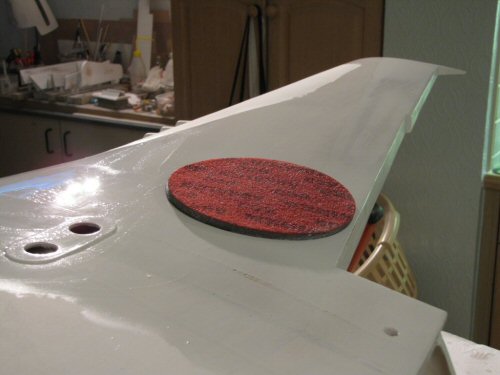
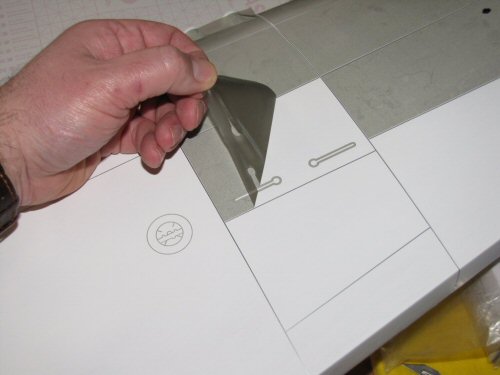
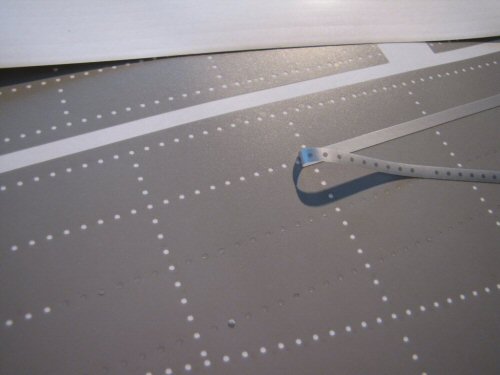
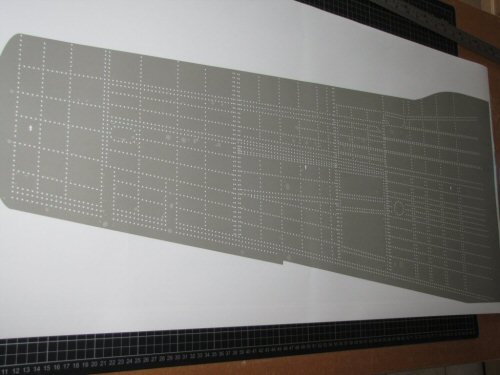
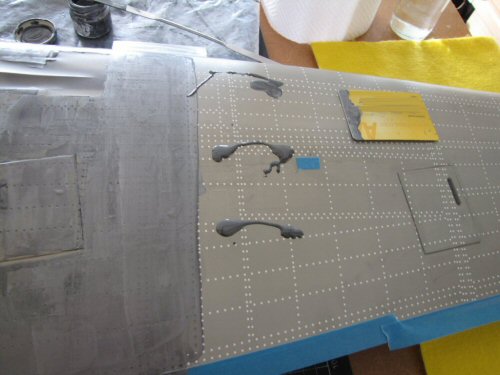
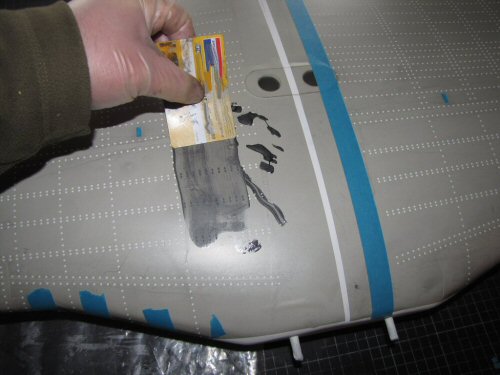
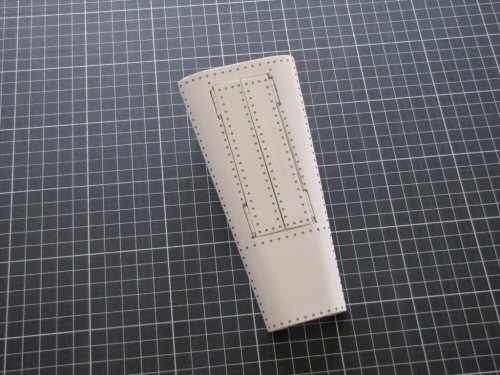
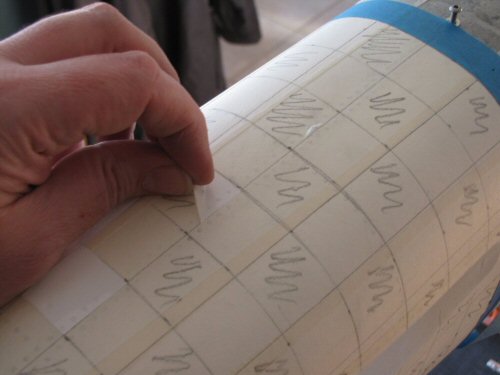
Pic 1. So everything has now been primed and panel lines added where needed. All set for the rivet masks !! Pic 2. I started with the smaller surfaces to improve my procedures. Before working on the model I had practiced on my test panel so I know this process works. It really was just a case of scaling things up to the model. I mixed some aluminium Klass Kote as normal, but then added 20% black to the mixture to give the rivets a contrasting colour to the standard colour, no thinners were added. In this picture a mask has been applied to the aileron and I have run some paint onto the surface to fill the holes. Pic 3. Spread over the surface with an old credit card the application could not be easier. Pic 4. After a few hours drying I removed the mask to reveal the rivets! It seems to be working well. Pic 5. With all the rivets needed the unwanted dots that were cut into the vinyl were removed with strips of old vinyl. This was much faster than trying to remove them one by one. Pic 6. Here a completed wing mask is shown. So save you the time there are 4,027 holes in the vinyl :)
|
 |
 |
 |
 |
 |
 |
| 1. Click to enlarge | 2. Click to enlarge | 3. Click to enlarge | 4. Click to enlarge | 5. Click to enlarge | 6. Click to enlarge |
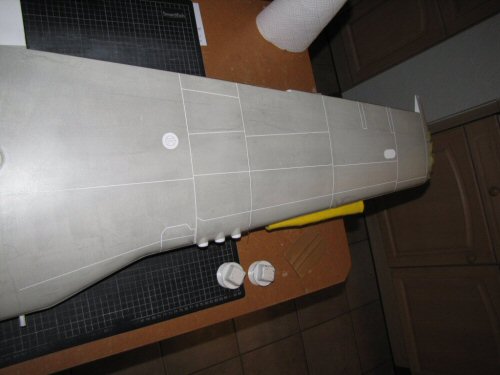
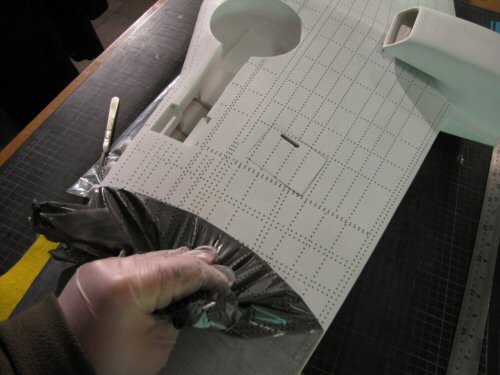
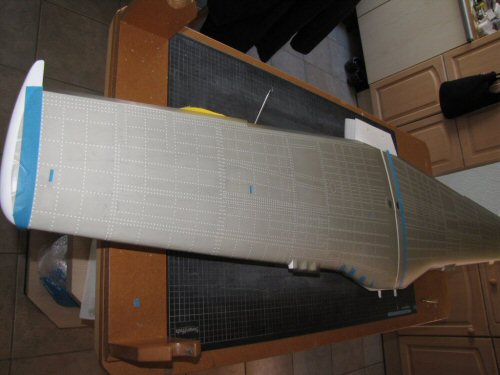
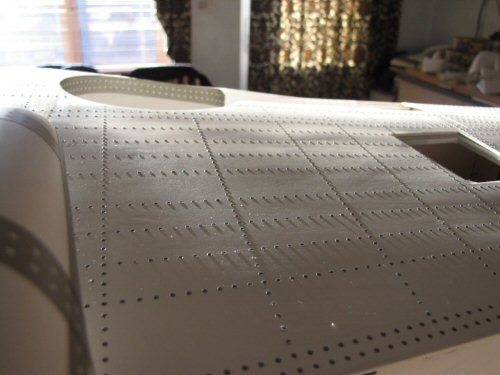
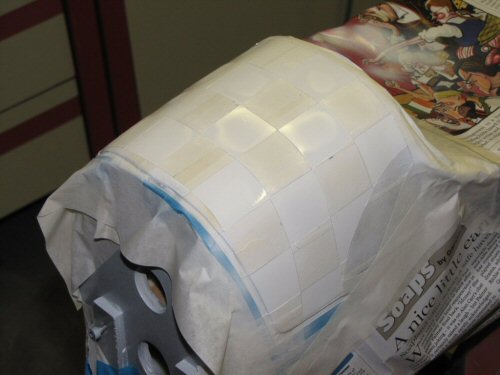
Pic 1. The masks were carefully prepared for application to the wing quarter sections using the pre marked registration positions laid down with the earlier masks used to position the panel lines. As you may suspect, getting full alignment was a little tricky but we got there with some patience. Pic 2. On goes the paint with the credit card. Working from one end to the other it took about 10 minutes to apply. I allowed the paint 4 hours to dry before removing the mask. Pic 3. Removing was straight forward, not real difficulties. Pic 4. Now it was time for the top side of the wings. Shown here fully installed and ready for the paint! Pic 5. More paint going on the surface. Pic 6. When the wing was finished I did not cut the rivets back with any wet and dry etc., I simply left them as they were. As you can see they do stand fairly proud of the surface. You will also see in this shot the air scoop has some strips of rivet detailing applied to the surface ready for paint. I made a number of these strips for the fuselage at the same time.
|
 |
 |
 |
 |
 |
 |
| 1. Click to enlarge | 2. Click to enlarge | 3. Click to enlarge | 4. Click to enlarge | 5. Click to enlarge | 6. Click to enlarge |
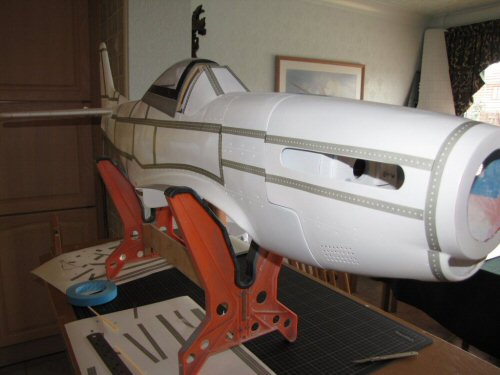
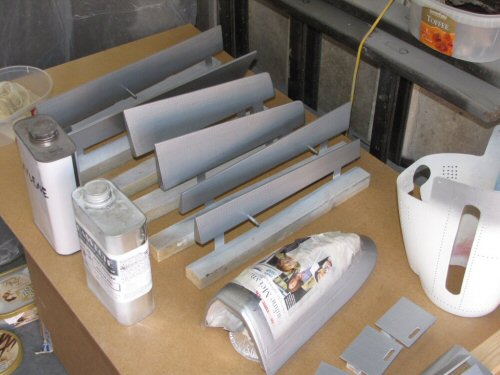
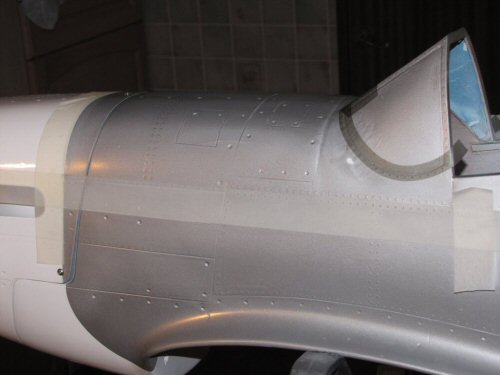
Pic 1. More of the rivet strips are shown here applied to the fuselage. Nothing too accurate as done for the wings, just something to carry on the theme from the wings so they look like they belong together! Pic 2. The small cover for the retractable tail wheel was also given some treatment, shown here completed. Pic 3. With the fuselage all done, it was now time to spray everything up. Pic 4. About to go silver the wing was in the garage ready for spraying. Klass-Kote Aluminium is a very easy paint to spray with HVLP equipment. It needs to be reduced with about 20% thinners to work with my spray gun. Pic 5. All the control surfaces were sprayed and allowed to stand in a relatively draught free area. Parts that were going to be sprayed white next were not painted. You can see the cowl in the picture only has the rear most area sprayed silver. Pic 6. The wing tips were also masked off as they too will be white in the next spray session. The rudder was not painted as that will be all black so it would be pointless making it silver. All in all the silver painting went well.
|
 |
 |
 |
 |
 |
 |
| 1. Click to enlarge | 2. Click to enlarge | 3. Click to enlarge | 4. Click to enlarge | 5. Click to enlarge | 6. Click to enlarge |
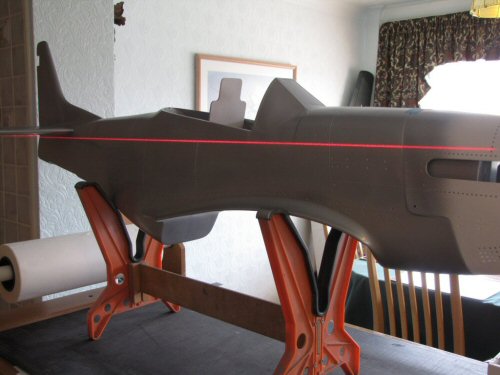
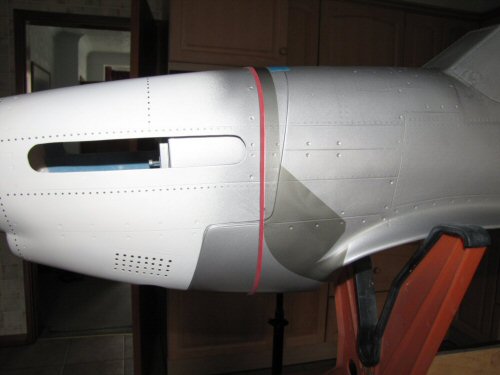
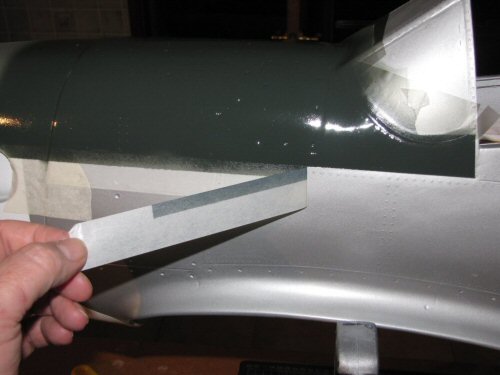
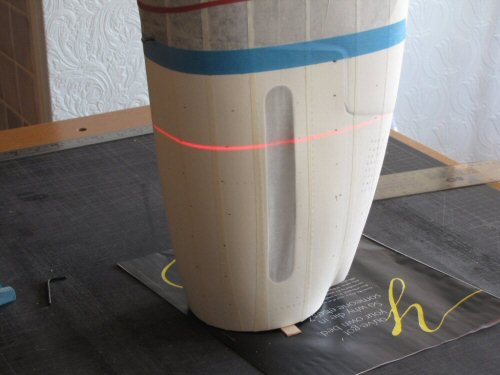
Pic 1. In an effort to get some lines correct I took my laser level to run a line down the centre line. I then used that reference to make a vertical line on the cowl, where I intend to start the black and white checker of the 78th fighter group. Pic 2. Although not pictured I mounted the engine and made the permanent fixing holes for the cowl before starting this section of the painting to be sure the position of the cowl was fixed. Where needed in future measurements and masking will be done with the fixing screws in position. I used a rubber band to mark the position of the white border. I then applied some additional masks to taper the white area under the wing. Pic 3. The wing tips are straight forward enough. The ailerons were dry installed to complete the assembly for the white wing tips. I simply ran masking tape down the exact line of silver paint. The ailerons were removed for masking and spraying. Pic 4. Once the white was on I decided to paint the green anti-glare forward of the cockpit. Masking was as before with the border of the white getting masked exactly on the line. Small masks were made to paint over the front cockpit area as shown. Pic 5. One thing I have realised with Klass Kote is that you need to remove masks immediately after paint has been applied, or wait a few hours for it to start to harden. Anything in between and you can end up with strings of paint pulling away from the surface with the masking tape. Here the tape is coming off while the paint is still very wet. Pic 6. As the cowl will be different colours at the mounting points I have sprayed a few bolts with the same colour. The other fixings are red and I will do likewise with some of those fixings when I get to them.
|
 |
 |
 |
 |
 |
 |
| 1. Click to enlarge | 2. Click to enlarge | 3. Click to enlarge | 4. Click to enlarge | 5. Click to enlarge | 6. Click to enlarge |
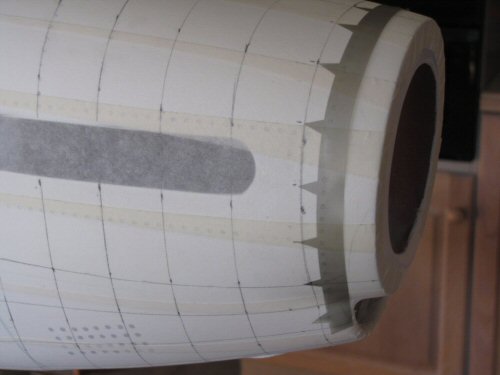
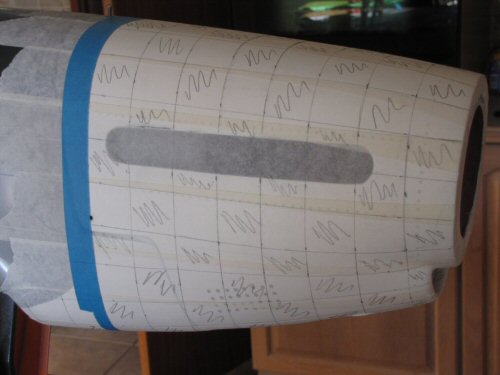
Pic 1. 78th Fighter Group have a very interesting chequred scheme on the cowl and the wing tips. Some thought went into how I could do this and I eventually decided to use a laser level to build up the reference lines. I started with the cowl covered in a good quality masking tape face down on a table top and ensured it was true vertical. I then divided the length of the chequers into the box divisions needed and ticked a mark along the sides. I carefully walked around the model with the laser level transposing the tick marks all the way round the cowl. It took some time but at least I know they were all the same length! All the vertical tick marks were joined together with a flexi ruler. You have to be careful not to rest the ruler on the cowl all the time as that can cause "twists" in the lines! Pic 2. For the horizontal lines there needed to be different rules for the front and rear because of the taper on the cowl. The rear markings were easy, I simply added equidistant check marks to give 22 squares all the way round starting at the top centre. The front divisions took some working out but I decided to do them in 2 halves - top and bottom. I drew a reference line on both sides from the rear reference check marks (2 down from the exhaust outlet) all the way forward. These would give the division between the top and bottom. I then simply measured the distance round the bottom of the cowl to the reference lines. I cut a mask with the relevant tick marks equidistant to each other. Likewise for the top I made a similar measure and added another mask. This is where you see it in the picture. You can see how the tick marks have been added using the mask and it's alignment with the lower horizontal line drawn which was my reference. Pic 3. Over 4 hours work here and it's all finished! Well there were some additional marks to add under the fuselage taking the pattern to the wing! Pic 4. With a new scalpel blade I carefully and with minimum force cut down all of the lines after identifying which elements were to be removed. I then began to lift off each section that was to be black. Pic 5. The wing tips were equally fiddly to work out but I prepared them as for the cowl with a run over of masking tape first before . . . Pic 6. . . .adding the reference lines. It took 3 attempts to get the tips right ! |
 |
 |
 |
 |
 |
|
| 1. Click to enlarge | 2. Click to enlarge | 3. Click to enlarge | 4. Click to enlarge | 5. Click to enlarge | 6. Click to enlarge |
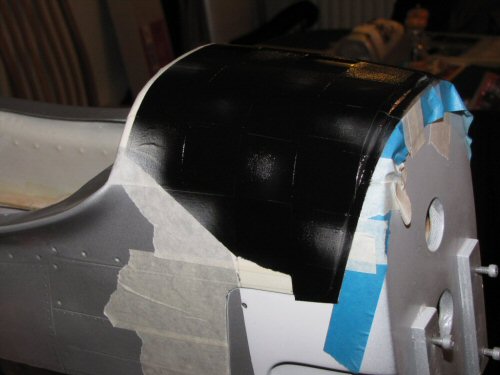
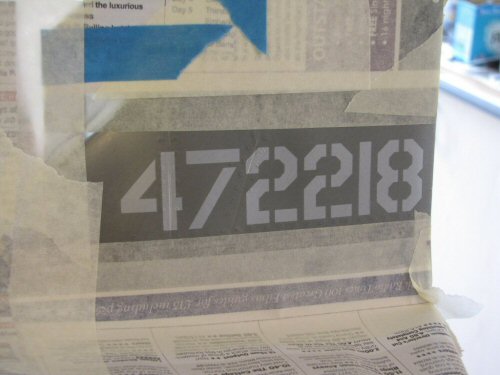
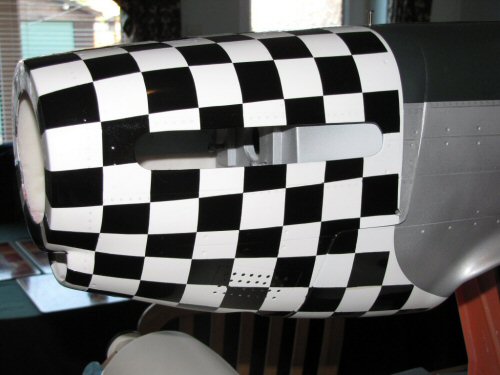
Pic 1. In the garage I painted the edges of the cuts white first to "heal" the scars of the scalpel. Pic 2. The black paint was applied in several layers building up the colour carefully. Shown here after the final application and removal of excess masking materials. I decided to allow the paint to dry fully before removing the masking tape. Pic 3. While I was painting the black I also painted the serial numbers on the fin, rudder, tail and fin tips tips (not shown). Pic 4. All the masking tape now removed from the cowl revealing the finished paintwork. A few slip ups in there but I am not telling where they are! Pic 5. The serial number revealed.
|
| The general painting is now complete so it's time to bring it alive with some of my Paint Maksks! - Click here |